Solar Arch for a Bavaria 36

Solar Arch for a Bavaria 36

Equipment and contruction diagram for making a solar arch, plus ideas for improvements that you could use in your design.

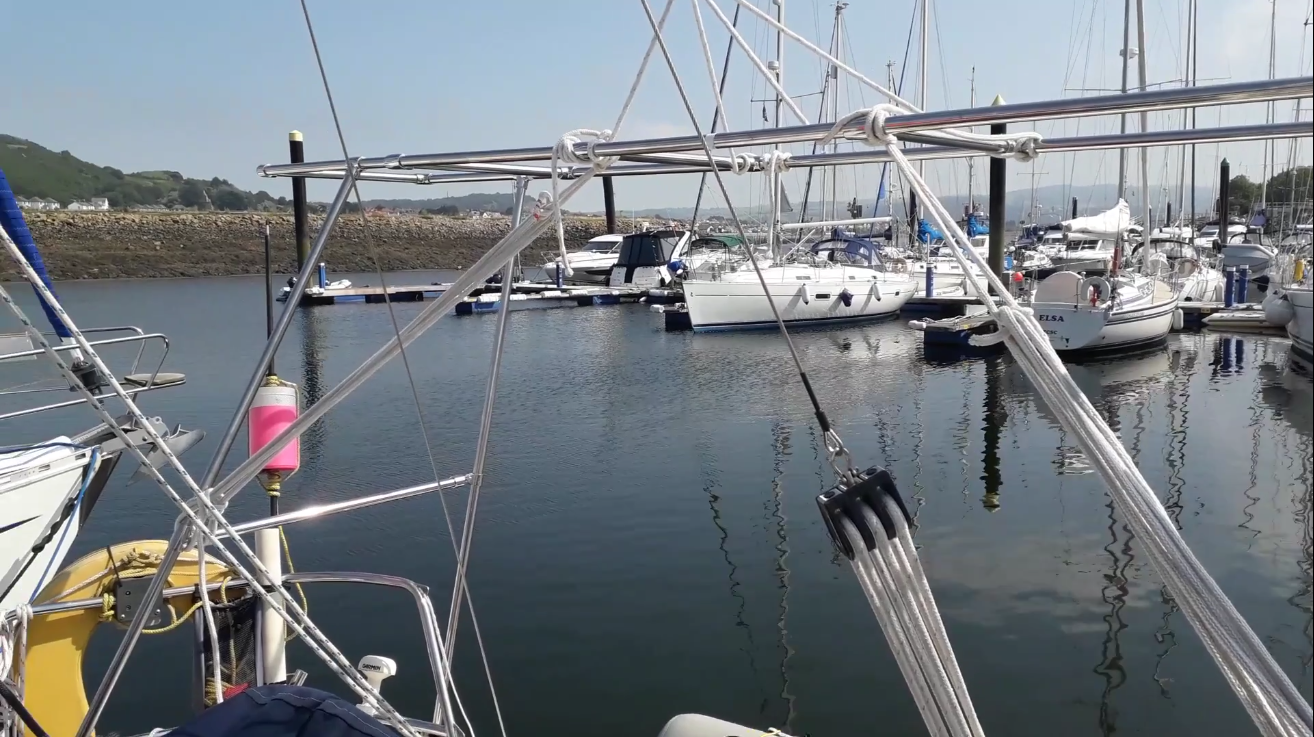
There are lots of things to consider when creating a solar system for your Bavaria yacht, weight was one of our key factors, another was where we could mount the arch

Arch

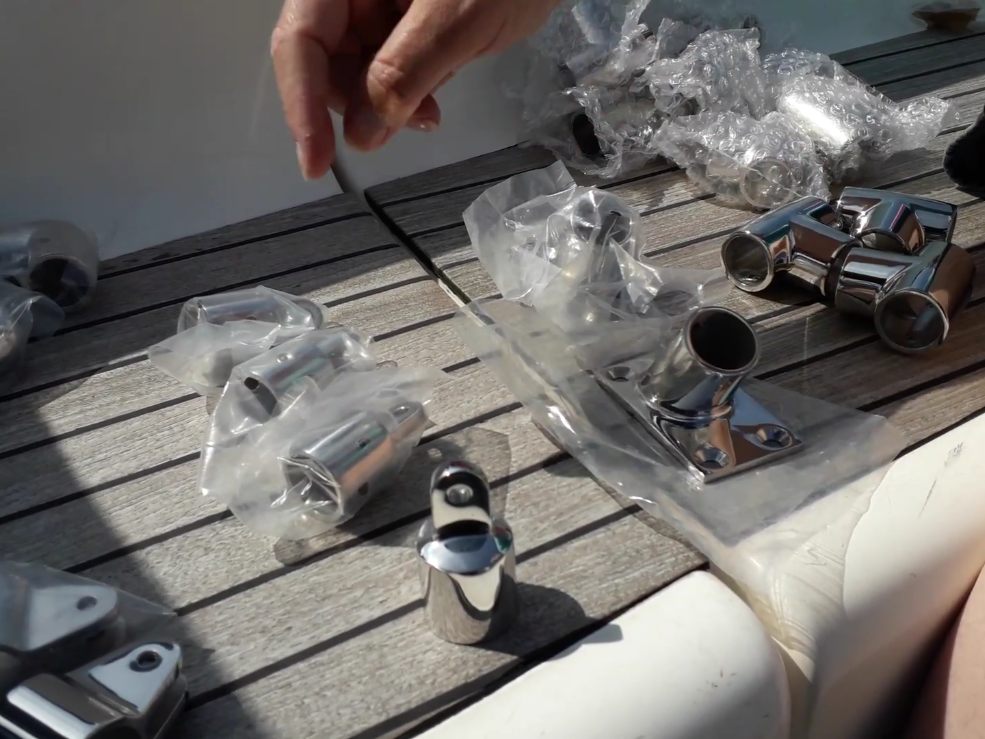
This we mounted on the back of the yacht using the hard point at the back and another fixing point on the rear of the boat. We used Seascrew to buy all the bits, and below is the list of all these items.

Equipment

Equipment
Qty Code Reference Description
2 60D 4111125 25mm 60 Degrees Slope Rectangular Deck Base
2 60P 4111425 25mm 60 Degrees Tee Joint With Grub Screws
12 TD 4111525 25mm 90 Degrees Tee Joint With Grub Screw
4 C 4111925 25mm 90 Degrees Corner ( Elbow ) With Grub Screws
2 SD 4667000 Deck Base Mount with drop nose pin for removal of Spigot
2 SP 4686102 25mm Tube Mounted Fork with Screw for all end eyes except the HD
4 SPE 4686103 25mm Tube End with Eye & Grub Screws Eye
5   HD_Tube-25-1 HD 1 Metre Length of Polished 316 Stainless Steel Tube 25mm
2   HD_Tube-25-1.5 HD 1.5 Metre Length of Polished 316 Stainless Steel Tube 25mm
2   HD_Tube-25-2 HD 2 Metre Length of Polished 316 Stainless Steel Tube 25mm
2   HD_Tube-25-3 HD 3 Metre Length of Polished 316 Stainless Steel

Please note that all references are for seascrew. To make the arch more secure we should of bought in addition to these

Qty Code Reference Description
4  TA 4111525 25mm 90 Degrees Tee Joint With Grub Screw
2   HD_Tube-25-1.5 HD 1.5 Metre Length of Polished 316 Stainless Steel Tube 25mm

Design

Design

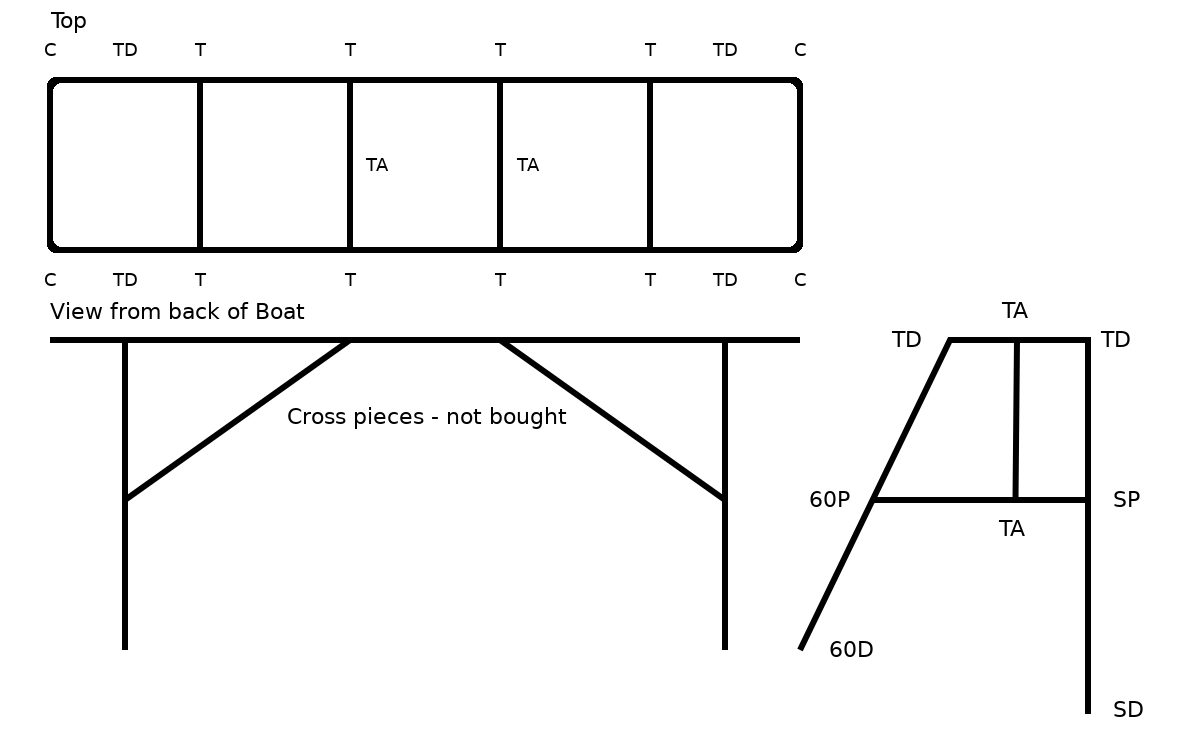
In this design there are various pieces, C - Corner, T - T pieces, 60D - 60° Deck fitting, 60P - 60° pipe fitting, SP - Swivel Pipe fitting and SD - Swivel Deck Fitting. TD is a T Piece, but it goes down towards the deck, while TA are the additional T pieces we should have bought for the cross pieces.

Although you should measure the pipe for your boat, we used the 2 x 3m lengths to go across our boat, the 2 x 1.5m lengths to be the 60° pipe, the 2 x 2m lengths to be at the back of the design, down onto the transom and we cut the three of the 1m pipes in half to make the top and the other two 1m pipes were used to make the side bracing

What we could have done better

P clip and Bolt

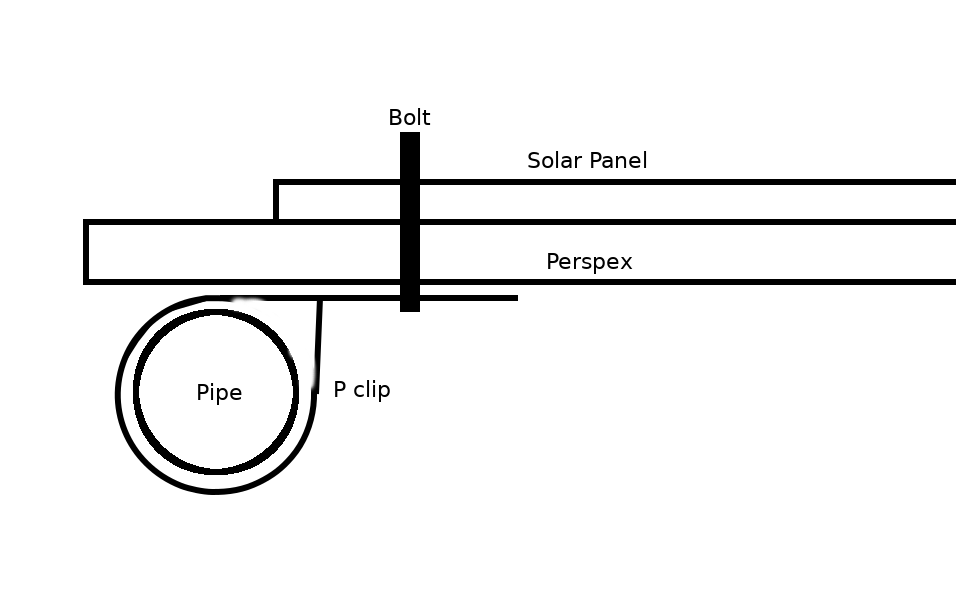
Apart from the cross braces that we should of added into our design, the other improvement that we should of designed in was the position of the P clips and the bolts. If we had done it right we would of cut the 1m pipes that went between the long lengths on the top of the arch so that the bolt that went through the P clip went through the Solar panel as well. We did not do this so we had to screw the bolt into a piece of wood and screw the panel down into the same wood while trying to avoid the other screws.


Raising money for the RNLI

The RNLI turned 200 years old on 4th March 2024. So as sailors and people who promote the joy of sailing, we thought that we would like to raise just £200. What we hope is that other people take up the shout and raise their own £200. In the last 200 years the RNLI have saved over 144,000 lives and yet they are funded entirely by people like you. They are not government funded.

DONATE NOW
Buy us a Coffee
Buy us a coffee
Affiliate Links
Follow Us
Facebook - Salty Lass
Prudence and Friends Facebook page
You Tube - Sailing Yacht Salty Lass
Instagram - SY Salty Lass